

If you are a MAC user and need to have a USB drive that can be used by both MAC and Windows computers this is the guide for you. It’s rare that I need to make one of these so inevitably every year or so I have to Google a solution and again and again, until one finally works. Often times the recommended solution is to download premium software or use Disk Utility. I’m not paying for something I don’t need, and sometimes a USB isn’t readable by Disk Utility if it was previously formatted as an installer drive. If you are comfortable with the command line you are just two commands away from a usable USB.
Find the USB
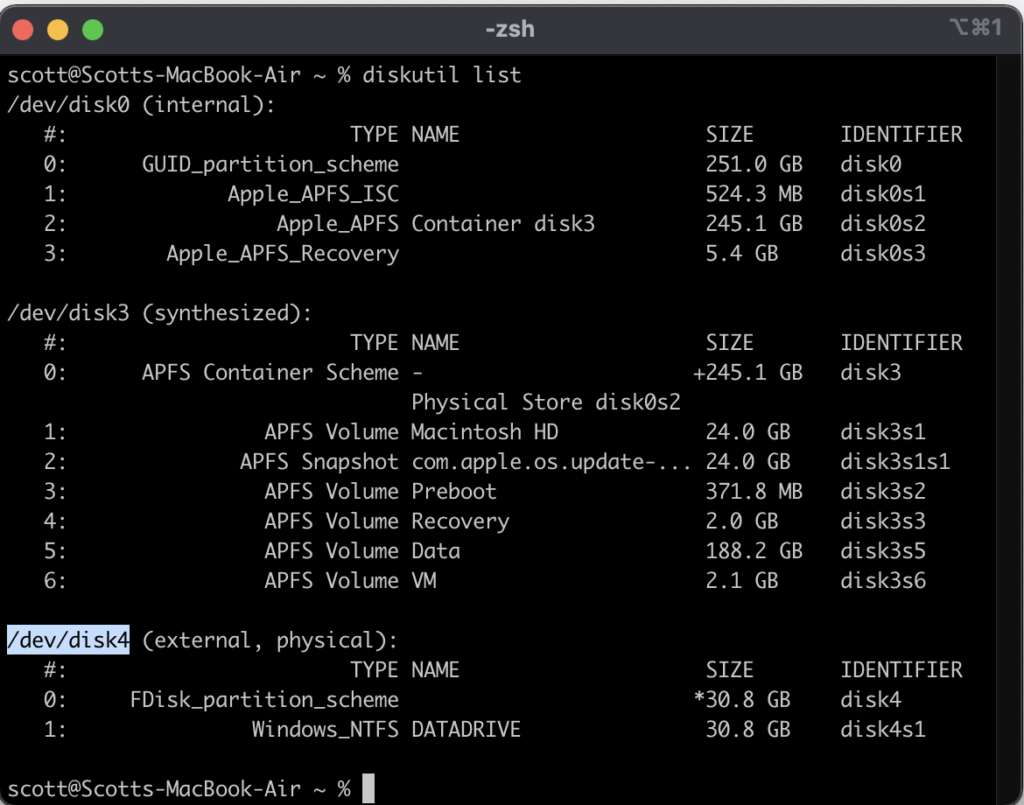
Open up your terminal and run the command diskutil list you should see all available drives listed on your computer. Note the name of the USB you are wanting to format. In our case it is dev/disk4.
Format the USB
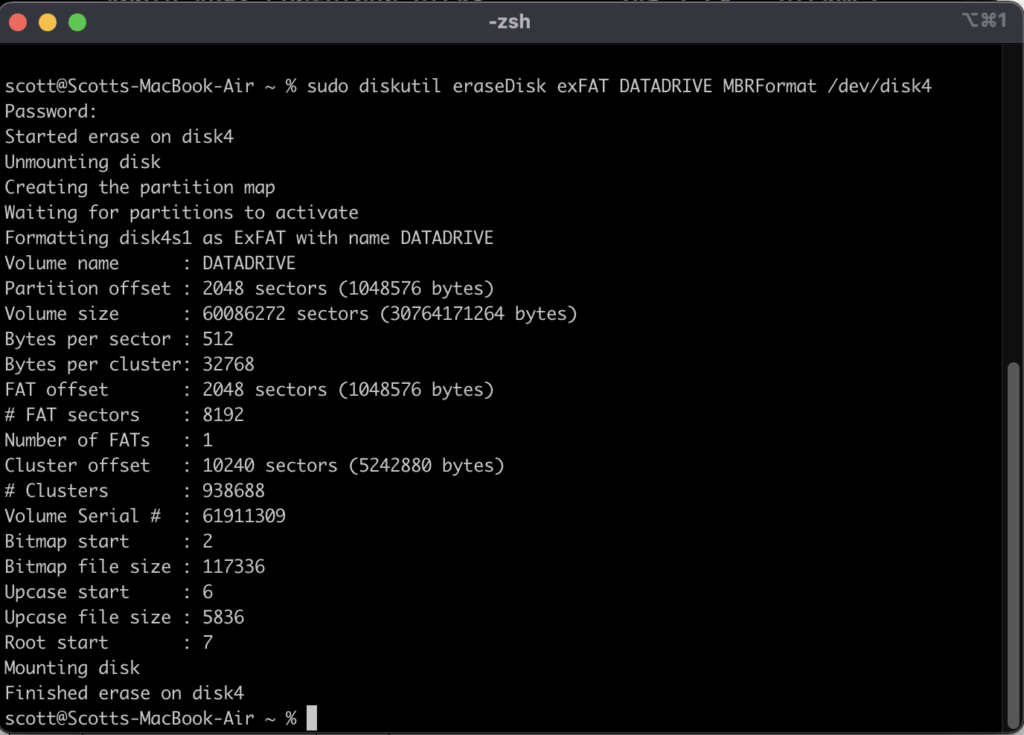
Next, we run the following command sudo diskutil eraseDisk exFAT DATADRIVE MBRFormat /dev/disk4 replacing DATADRIVE with whatever you want to name the USB and /dev/disk4with the name of the USB drive you got from the command above.
Conclusion

That’s it simply run those two commands and you should have a working USB. We used exFAT as it is supported by both Windows and MAC operating systems. Additionally, the reason why we choose exFAT over FAT32 is FAT32 has a 4GB max file size where as exFAT has no limit.